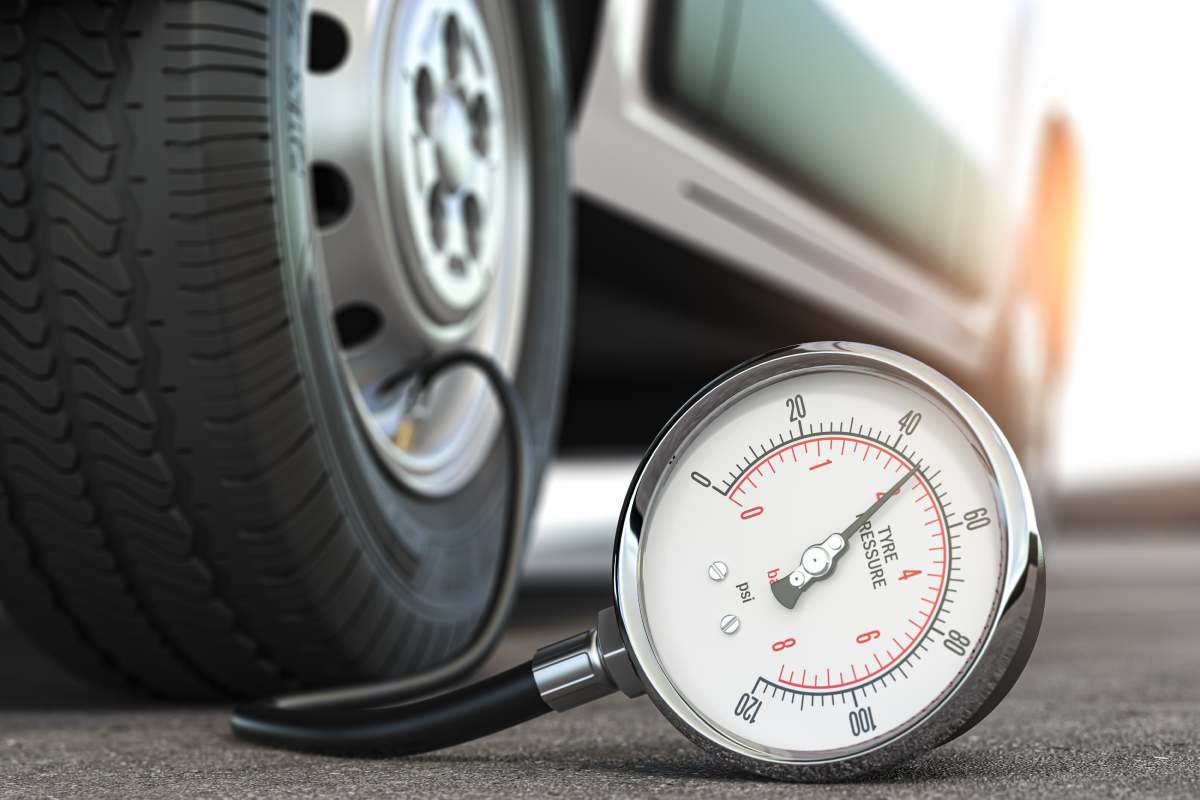
PSI Vs Bar Cold Readings
Tire pressure is usually listed in two units: PSI (pounds per square inch) and bar. Many tire placards in the U.S. use PSI, while some vehicles and tire shops in other regions use bar. The same physical pressure can be expressed in both units, so the key task is converting correctly and reading the tire under the conditions the manufacturer intended.
Most vehicle door jamb labels specify a target pressure for “cold tires,” meaning the tires have not been driven long enough to heat up. A hot tire reading can run higher than the cold value because air pressure rises with temperature. For example, a tire that warms by a few tens of degrees can show a noticeable increase on the gauge, even if the tire’s actual starting pressure was correct.
In practice, you can treat the placard as the source of truth for your car’s load and tire size, then use PSI or bar conversion to match your gauge. If your gauge reads only one unit, you still adjust the tire to the placard value after converting. I keep a small note in my garage that says 1 bar is about 14.5 PSI; I still check the exact conversion for the gauge I’m using, because rounding differences show up when you’re working near 30–40 PSI.
Common Pressure Mistakes
People often mix up three different references: the door placard target, the tire sidewall maximum, and the gauge’s current reading. The tire sidewall number is typically the maximum pressure the tire can handle, not the recommended pressure for your vehicle. Using the sidewall maximum as a daily target can lead to a harsher ride and uneven wear.
Another frequent error is measuring after driving. A short commute can heat the tire enough to shift the gauge reading, and the amount of shift depends on ambient temperature, speed, and how long the tire has been rolling. If you adjust based on a hot reading, you can end up underinflating relative to the cold specification.
Gauge accuracy also matters. Cheap dial gauges can drift, and some digital gauges show a stable number only after a brief venting cycle. If you’ve ever borrowed a pump at a station and watched the reading jump around, that’s often the gauge settling, not the tire “changing its mind.” A quick cross-check with a second gauge you trust, or a calibration check against a known standard, reduces guesswork.
Load and tire size dependencies create another layer of confusion. The placard pressure can change with vehicle load (for example, normal passengers versus full cargo) and with tire size variants. If you swap tire sizes or use a different wheel package, the placard may no longer match the tires you installed, and the correct target may be on a different label or in the owner’s manual.
How To Measure Correctly
Read The Placard First
Start with the vehicle’s door jamb label or the tire-pressure section in the owner’s manual. Use the pressure value that matches your tire size and your load condition. Many labels list separate numbers for front and rear, and some include a higher setting for heavy loads. If your car uses different pressures for different tire sizes, do not assume the numbers carry over.
Then match units. The conversion is consistent: 1 bar is approximately 14.5038 PSI. In everyday driving, many people round to 14.5, which is usually close enough for setting pressure, but rounding can matter when you’re adjusting by only a few PSI. If your placard says 2.3 bar, that corresponds to about 33.4 PSI; rounding to 33 PSI versus 34 PSI changes the result by roughly 1 PSI.
Use Cold Tires Every Time
Measure when the tires are cold, typically after the car has been parked for at least a few hours and before driving. A common rule used by manufacturers is “cold” meaning the tires haven’t been driven more than a short distance. If you’re checking during a trip, park and wait long enough for the tires to cool toward ambient temperature, then measure again.
If you only have access to a station after driving, treat the reading as a clue rather than a final target. You can still adjust, but you’ll need a correction approach based on your typical temperature rise, which varies by route and season. That’s why the cold method remains the most reliable for home checks.
As a small aside, I’ve noticed that my gauge reads differently when the tire valve cap is missing and the valve core is slightly dirty. A quick wipe of the valve area and a snug cap after checking reduces air leaks that can masquerade as “mysterious pressure loss.”
Pick A Gauge You Trust
Use a gauge that you can read accurately and that holds a stable number. Dial gauges can be affected by impact, and some digital gauges require a firm seal on the valve. If your gauge has a “bleed” or quick-release button, avoid venting more than needed; it’s easy to overshoot when you’re working in small increments.
For outcomes, a practical target is to set pressures within about 1 PSI (or about 0.07 bar) of the placard value. That tolerance reflects typical gauge variability and the fact that tires naturally fluctuate with temperature. If you’re consistently off by more than 2–3 PSI, the gauge, the measurement method, or the placard reference likely needs attention.
On my bench, I keep a digital gauge labeled “v2.1” on the storage case; I check it against a second gauge once or twice per season. That habit catches drift before it turns into a month-long underinflation problem.
Adjust With Small Steps
When adding air, add in short bursts and re-check. Air pumps can overshoot, especially on high-volume compressors that inflate quickly. If you overshoot, release air in tiny amounts and re-measure, rather than trying to “guess” the final number.
After adjusting, confirm all tires, including the spare if it’s used as a temporary replacement. Spare tires often sit at a different pressure target and may require periodic checks even when the vehicle is not in use. If your vehicle uses a tire-pressure monitoring system (TPMS), the system can flag low pressure, but it does not replace manual verification.
TPMS sensors measure pressure indirectly or directly depending on the system design. Indirect systems infer pressure from wheel-speed changes, which can lag behind real pressure changes. Direct systems measure pressure at the sensor and can still show delayed updates after inflation, so manual checks remain the fastest way to confirm the actual tire pressure.
Case Examples For Real Cars
Road Trip With Hot Tires
A driver checks tire pressure at a gas station right after highway driving. The gauge shows 36 PSI on a tire whose placard target is 32 PSI (about 2.2 bar). The higher reading is consistent with heat buildup rather than a true overpressure condition. The driver waits 30–45 minutes parked in shade, rechecks, and then adjusts to the cold target. The TPMS warning clears after the tires cool and the pressure stabilizes.
The lesson is mechanical: temperature changes air pressure, so the “right number” depends on the tire’s thermal state. The cold placard target stays the reference, and the gauge reading becomes meaningful only after the tire temperature approaches ambient.
Unit Confusion After Tire Swap
Another driver replaces tires with a different size and uses a pump that displays bar. The door placard lists 35 PSI for the front tires, but the driver sets 35 bar by mistake after misreading the pump display. The tires become overinflated, leading to a harsher ride and faster center tread wear risk. After noticing the error, the driver converts correctly: 35 PSI is about 2.41 bar, then resets to the placard value and rechecks after a short cool-down period.
This scenario shows why the placard and unit conversion must be treated as a single step. A conversion error can be more damaging than a small measurement error because it changes pressure by an order of magnitude.
PSI Bar Conversion Checklist
| Placard Unit | Example Value | Converted PSI | Converted Bar |
|---|---|---|---|
| Bar | 2.2 bar | ~31.9 PSI | 2.2 bar |
| PSI | 32 PSI | 32 PSI | ~2.21 bar |
| Bar | 2.4 bar | ~34.8 PSI | 2.4 bar |
| PSI | 35 PSI | 35 PSI | ~2.41 bar |
Step-by-step checklist for a cold, unit-safe check:
- Locate the door placard target for your tire size and load condition.
- Convert the target to match your gauge’s unit (1 bar ≈ 14.5 PSI).
- Measure after the tires cool to near ambient temperature.
- Press the gauge firmly on the valve; read the stable number.
- Add air in small bursts, then re-check until you reach the converted target.
- Repeat for each tire, including the spare if it has a specified pressure.
Pros-and-cons of measurement approaches:
- Manual cold check: Pros—closest match to the manufacturer target; Cons—requires time and a gauge.
- Hot check at a station: Pros—quick warning; Cons—temperature bias makes it harder to hit the cold target.
- TPMS-only: Pros—alerts you when pressure drops; Cons—may lag and does not replace cold verification.
Common Mistakes To Avoid
One mistake is chasing the gauge reading without verifying the reference. If the placard lists 2.3 bar and you set 2.3 PSI, the error is massive and the tire will underinflate quickly. Another mistake is using the tire sidewall maximum as the daily target, which can lead to overinflation and uneven wear.
Drivers also forget that pressure changes with temperature. A tire can lose or gain pressure across seasons, so a single check in one month does not cover the next. If you live where winter mornings drop sharply, checking monthly during seasonal transitions reduces surprises.
Valve issues can mimic pressure problems. A slow leak from a damaged valve stem, a cracked valve cap, or a leaking core can drop pressure even when you set the correct number. If a tire repeatedly loses pressure within days, stop adjusting and inspect the valve and tire for leaks.
Finally, avoid mixing tire sizes and pressure targets. If you install a different size than the placard specifies, the correct pressure may change. The owner’s manual or the tire manufacturer’s fitment guidance should be the reference when the tire size differs from the original equipment.
FAQ
What Does “Cold Tire” Mean?
Cold tire pressure refers to tires that have not built up significant heat from driving. A practical approach is to measure after the car has been parked for several hours and before you drive, then adjust to the placard’s specified cold target.
How Do I Convert PSI To Bar?
Use 1 bar ≈ 14.5 PSI. For example, 32 PSI converts to about 2.21 bar, and 2.4 bar converts to about 34.8 PSI. Rounding can shift the result by around 1 PSI, so match your gauge tolerance.
Should I Inflate To The Tire Sidewall Number?
No. The sidewall maximum is the highest pressure the tire can safely handle under specified conditions. The daily target comes from the vehicle placard or owner’s manual for your tire size and load.
Why Does My Pressure Read Higher After Driving?
Air temperature rises during driving, and warmer air increases pressure. The gauge reading reflects both the tire’s pressure and its temperature, so hot readings do not directly match the cold placard target.
How Often Should I Check Tire Pressure?
A practical schedule is at least once per month and again during seasonal temperature swings. If you notice TPMS alerts, uneven wear, or frequent pressure changes, check more often and inspect for leaks.
Author's Insight
Cold-tire pressure targets exist because tire manufacturers design ride and wear around a specific thermal state. Temperature-driven pressure changes explain why hot readings often look “wrong” even when the tire is behaving normally. Unit conversion between PSI and bar is consistent, but rounding and gauge accuracy can create small errors that matter when you chase exact numbers.
For decision-making, the door placard and the cold condition carry more weight than the tire sidewall maximum and than a station’s hot gauge reading. When pressure keeps dropping, the measurement method becomes less important than finding the leak source.
Key Takeaways
- Use the vehicle placard for the target pressure; treat the tire sidewall maximum as a safety limit, not a daily setting.
- Measure cold, then adjust to the converted placard value using 1 bar ≈ 14.5 PSI.
- Expect hot readings to be higher due to temperature; wait for cooling if you need the cold target.
- Set pressure in small steps and re-check each tire; repeated losses point to a leak or valve issue.