Interior Detailing Basics
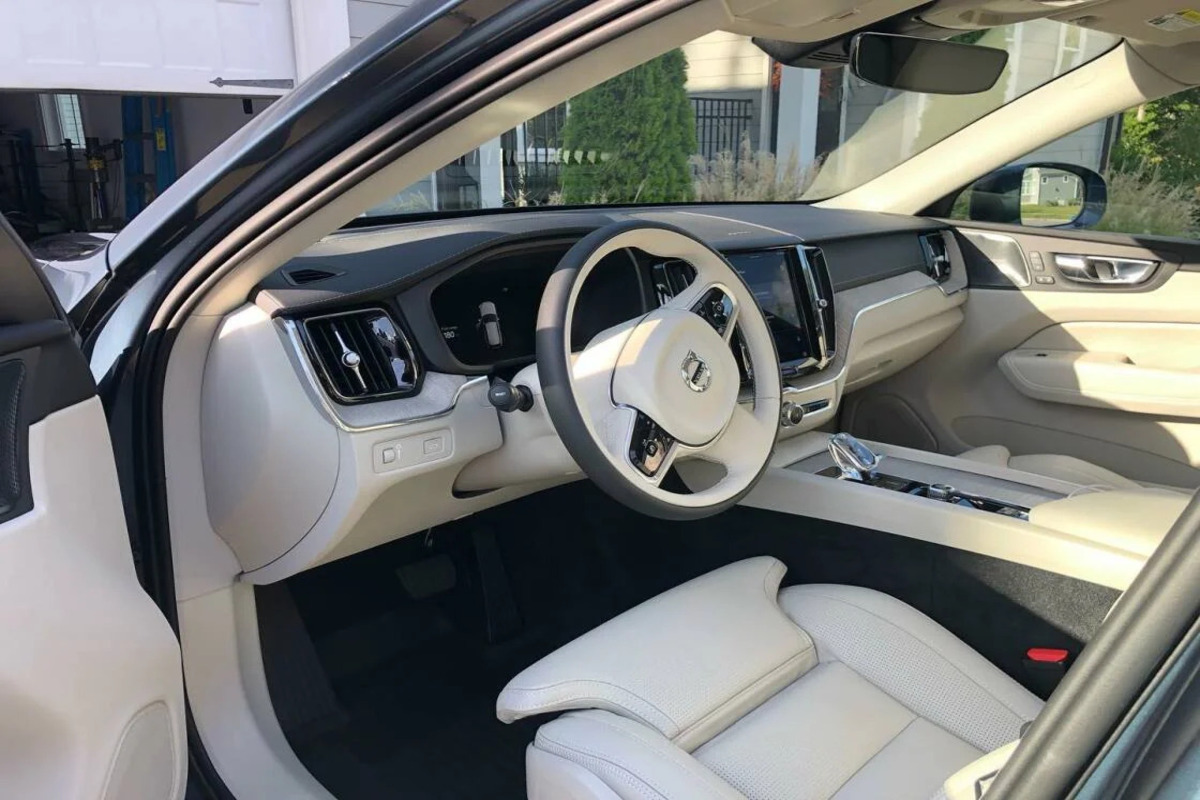
Interior detailing targets three different problems: visible soil, sticky residues that attract new dirt, and trapped odors that linger after the surface looks clean. A practical approach starts with identifying the material first, then matching the cleaner and tool to that material. For example, a dashboard wipe that feels “clean” can still leave a film that turns dust into a gray haze within days.
Begin by removing loose items and debris, then vacuum in a pattern that prevents re-soiling. Use a crevice tool for seams, a brush attachment for textured plastics, and a soft nozzle for delicate surfaces. If you have a small handheld vacuum, it helps for cup holders and seat tracks where crumbs hide. I keep a microfiber stack labeled by use—one for glass, one for interiors—because cross-contamination is how streaks and haze happen.
Next, treat high-touch zones with a plan. Door pulls, steering wheel spokes, and the center console collect skin oils and hand lotions that normal “all-purpose” sprays often smear. Work in small sections and wipe immediately, rather than letting cleaner dry on the surface.
Problems And Pain Points
People often start with the wrong order: they spray interior cleaner first, then vacuum, then wipe. That sequence grinds loosened dirt into carpets and leaves residue on plastics. Another common issue is using one product for everything, which ignores how leather, Alcantara-like suede, and painted plastics react to solvents and surfactants.
Material compatibility depends on supporting technologies inside the cabin. Many modern interiors include coatings on touchscreens, UV-stabilized clear coats on trim, and adhesives under trim pieces. Aggressive alcohol blends, strong degreasers, or steam near electronics can cause hazing, peeling, or adhesive softening. Even “safe” sprays can fail when they sit too long, which is why dwell time matters.
Odor removal also gets misunderstood. Smells often come from moisture trapped in floor mats, spilled beverages absorbed by fabric, or microbial growth in HVAC condensate. Surface deodorizing masks odor while the source remains. If you smell sourness after rain or car washes, the source frequently sits under mats or in the HVAC intake path, not on the seat surface.
Solutions And Advice
Choose Tools By Surface
Use a microfiber system rather than a single cloth. For glass, use a dedicated glass microfiber and a streak-resistant cleaner; for plastics and screens, use separate low-lint cloths. A soft detailing brush with nylon bristles works for vents and textured trim, while a boar-bristle style brush can help lift dust from fabric without grinding it deeper.
For suction, a vacuum with a brush head reduces the “polishing” effect that can spread grit. A small shop-vac with a crevice attachment can reach seat rails, but keep the nozzle moving to avoid scuffing. If you detail on a schedule, a 5–10 minute pre-vacuum reduces the amount of chemical contact needed later.
Use Dilution And Dwell Time
Interior cleaners often work by loosening oils and grime through surfactants, then lifting soil with agitation. That means dilution ratios matter. Follow the label ratio for interior APCs and upholstery cleaners, and avoid guessing. Dwell time should be short for plastics and screens; if the label suggests a range, start at the low end and increase only if soil remains.
For example, an upholstery cleaner used too strong can leave a sticky residue that attracts dirt. A dashboard cleaner used too long can dry into a film that looks like “clean shine” but turns into dust magnet. I’ve seen this after using a spray-and-walk-away product; the surface looked fine for a day, then the dust pattern returned.
Clean Seats With Controlled Agitation
Fabric seats respond well to a two-step method: pre-treat stains, then extract or blot. Pre-treating with a dedicated upholstery spot cleaner loosens localized soil, and blotting prevents spreading. For extraction, a carpet extractor or wet/dry vacuum with an upholstery tool reduces residue compared with heavy soaking.
Leather and vinyl need gentler chemistry and careful wiping. Use a leather-safe cleaner and a separate conditioner step only when the leather is dry or label instructions call for it. Avoid soaking seams; water can travel under stitching and into foam. For Alcantara-like materials, use a soft brush and a fabric cleaner designed for that surface type, then allow full drying before closing windows.
Handle Odors With Source Focus
Start with moisture control. Remove and shake floor mats, then vacuum the carpet edges and under-mat areas. If a spill occurred, blot first, then use an upholstery cleaner suited to the fabric type; do not rely on fragrance sprays. For persistent odors, check HVAC intake areas and cabin filter condition, since stale air often comes from the filter and evaporator area.
When using odor neutralizers, choose products that target odor molecules rather than masking scents. Follow label directions for ventilation and contact time. If the odor returns quickly, the source likely remains in fabric padding or HVAC components, and repeated surface spraying will not fix it.
Case Examples
Sticky Console After Weekly Wipes
A driver cleaned the center console every weekend using a single all-purpose spray and a single microfiber cloth. After two weeks, the console looked clean but felt tacky and attracted dust. The likely cause was residue left by the cleaner and insufficient rinsing or residue removal on textured plastics. The fix involved switching to a plastic-safe interior cleaner, using a damp microfiber to remove any remaining residue, and drying with a second cloth. The driver also stopped spraying directly onto the console and instead sprayed the cloth to control overspray.
Musty Smell After Rain
A driver noticed a musty odor after heavy rain, even when the seats looked dry. Vacuuming the visible carpet did not change the smell. The likely source was moisture trapped under floor mats and possibly in the HVAC system. The driver removed mats, dried the cabin with ventilation, and inspected the cabin air filter. After drying and cleaning the under-mat area, the odor reduced, which suggested the source was moisture rather than surface grime.
Checklist For Products
| Surface Type | Cleaner Choice | Tool Choice | Common Risk |
|---|---|---|---|
| Glass | Streak-resistant glass cleaner | Dedicated glass microfiber | Smears from overspray or dirty cloth |
| Dashboard/Trim | Interior plastic cleaner, short dwell | Low-lint microfiber + soft brush | Haze or dust-attracting film |
| Leather/Vinyl | Leather-safe cleaner; conditioner when needed | Microfiber + soft applicator | Drying or discoloration from harsh solvents |
| Fabric Seats | Upholstery cleaner; spot treatment | Soft brush + extraction/blotting | Residue that re-soils quickly |
| Alcantara-Like | Surface-specific fabric cleaner | Soft brush; gentle blot | Matting from over-wetting |
Step-by-step workflow that reduces rework: pre-vacuum, spot-treat stains, clean from top to bottom, wipe plastics with controlled dwell, then extract or blot fabric, and finish with glass. Leave drying time between steps so you do not trap moisture under a “clean” layer. If you use a drill brush, keep it low speed and test on a hidden seam first, because agitation can change texture.
Common Mistakes To Avoid
Spraying cleaner directly onto screens and vents causes overspray and can push residue into seams. A safer habit sprays onto a microfiber cloth first, then wipes lightly. Another mistake is using the same cloth for leather and glass; oils and cleaners transfer and create streaks or dull patches.
Over-wetting carpets and seat bases leads to long dry times and can worsen odors. If you see water pooling at the edges of upholstery, stop and switch to blotting and extraction. People also skip a test spot; a quick test on the underside of a seat or behind a console corner reveals whether the cleaner darkens fabric or leaves a sheen on plastics.
Some “interior protectant” products leave a glossy film that looks good under garage lighting but attracts dust in real driving. If you notice a slippery feel on touch surfaces after cleaning, remove residue with a damp microfiber and dry cloth. I once used a protectant that smelled strongly for days; the label did not mention ventilation time, and the cabin air felt off until the product fully dissipated.
FAQ
What Should I Start With?
Start with a dry vacuum to remove grit, then spot-treat stains, then clean surfaces top to bottom. Finish with glass so you do not smear cleaner onto windows after interior work.
Can I Use One Cleaner For Everything?
Use material-specific products. A single APC can work on some plastics, but it can damage leather finishes, leave residue on screens, or over-wet fabric.
How Do I Clean Touchscreens Safely?
Use a screen-safe cleaner and microfiber designed for electronics. Spray onto the cloth, wipe gently, and avoid letting liquid reach seams around the bezel.
How Long Should Seats Dry?
Dry time depends on humidity and how much liquid you used. Plan for at least several hours with ventilation; if you can still smell dampness or feel cool moisture, extend drying.
What Removes Odors Without Masking?
Target the source: remove moisture, clean under-mat areas, and address HVAC cabin filter condition. Use odor neutralizers that specify odor-molecule targeting, then ventilate until the smell fades.
Author's Insight
Interior detailing works best when you treat it like controlled chemistry plus controlled agitation. Cleaner residue and moisture are the two most common reasons “clean” results fail within days. Product labels and material compatibility guidance matter because plastics, leather finishes, and fabric fibers respond differently to solvents and surfactants.
For planning, I treat each session as a sequence: dry removal of grit, minimal dwell chemistry, and drying time. On a small personal note, I keep a dated checklist in a phone notes app (last updated 2026-08) so I do not skip the under-mat vacuum step that often drives odor complaints.
If you want a measurable outcome, track the number of passes needed to remove visible soil and whether the surface feels tacky after drying. That feedback guides which cleaner strength and tool type to adjust next time.
Key Takeaways
- Match cleaner and tools to material type, then control dwell time to avoid residue films.
- Vacuum first, clean from top to bottom, and finish with glass to reduce rework.
- Use controlled agitation and blot/extract fabric to prevent sticky re-soiling.
- Address odors by removing moisture and checking HVAC-related sources, not by masking smells.
- Test a hidden spot before full-area cleaning, especially on leather finishes and textured plastics.