Understanding Limescale
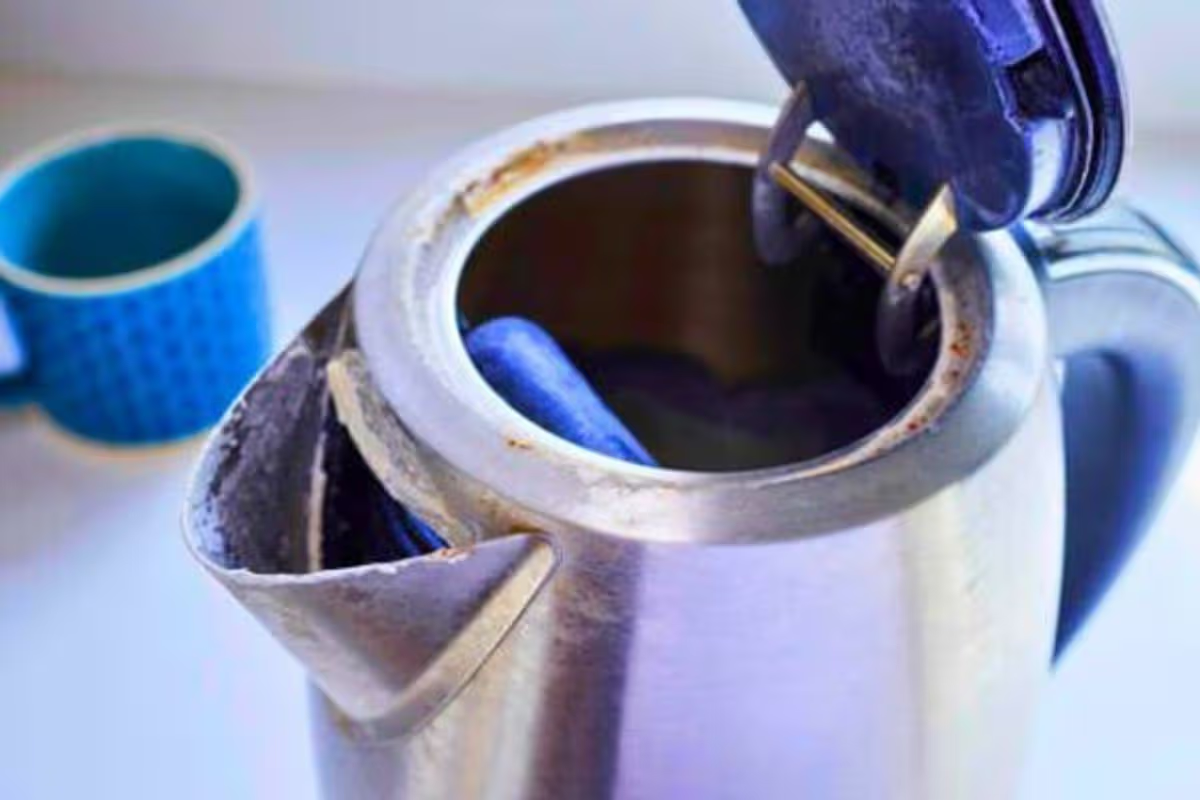
Limescale is a mineral deposit, mainly calcium carbonate, that forms when hard water is heated and dissolved minerals precipitate out. In a kettle, the deposit often starts at the heating plate or element and spreads upward as water repeatedly boils. In coffee makers, scale can build in the boiler, heater, and narrow internal tubes where flow rates are lower and temperatures stay high.
Hardness is usually measured as calcium and magnesium content, often reported as mg/L or degrees of German hardness (°dH). Higher hardness means more mineral content per litre, so deposits accumulate faster. If you notice chalky white or pale grey crust around the spout or on the base, that deposit is typically limescale rather than detergent residue.
Scale affects performance in practical ways: it acts as an insulating layer, so the kettle may take longer to reach a boil and may use more energy. In coffee machines, scale can reduce flow, change brew temperature stability, and leave off-tastes if descaling is incomplete. A mild aside from routine maintenance logs: many people clean the outside and forget the internal hot-water path, which is where the deposits actually matter.
Common Pain Points And Myths
People often treat limescale as a purely cosmetic issue. In reality, deposits inside heating and plumbing surfaces can interfere with heat transfer and water movement. Another frequent mistake is using too little descaler or stopping early because the kettle looks “clean enough” from the outside.
Cleaning products depend on chemistry. Calcium carbonate dissolves in acidic solutions, which is why vinegar and commercial descalers work. The supporting technology is the heating system and the machine’s internal flow path: kettles heat a relatively small volume directly, while many coffee makers heat water in a boiler and then pump it through tubing and a group head or filter area.
Some coffee makers also include sensors or valves that can be sensitive to harsh chemicals or prolonged soaking. That sensitivity varies by model, and manuals often specify a maximum contact time. If you skip the manual and guess, you may end up with lingering odours or residue that shows up as sour notes in the next few cups.
There is also a myth that boiling water alone “prevents” scale. Boiling drives precipitation; it does not remove existing deposits. You can sometimes reduce future buildup by using filtered water or a water softener, but removal still requires descaling for deposits already present.
Descaling Solutions And Advice
Choose The Right Descaler
Use a descaling product that states it is suitable for kettles or coffee machines and lists the active acid. Common actives include citric acid or sulfamic acid in many commercial descalers, while vinegar is acetic acid. Citric acid tends to be gentler on some metals and seals, but the correct choice depends on the manufacturer’s guidance for your specific appliance.
If your coffee maker has a manufacturer-approved descaling cycle, follow that cycle rather than improvising. For kettles, check whether the heating element is exposed or concealed, since exposed elements can trap scale in crevices. A small practical aside: I’ve seen people buy “kettle descaler” for a coffee machine and then wonder why the internal pump still smells—internal rinsing steps differ by design.
Use Correct Dose And Time
Measure the descaler amount by the label instructions or the appliance manual. Over-dosing can increase the chance of lingering odour and residue, while under-dosing can leave scale behind. For vinegar, many households use a diluted solution, but dilution ratios vary; the safest approach is to follow the appliance manual or a product label that matches your appliance type.
Contact time matters because scale dissolves gradually. If the label says to soak for a set period, respect it, then rinse thoroughly. For kettles, a typical pattern is to fill, heat to dissolve, then let it sit briefly before emptying. For coffee makers, descaling usually requires running the solution through the water path, then repeating with clean water until the smell and taste normalize.
Rinse Until Taste Normalizes
Rinsing is not optional. After descaling, run multiple cycles of clean water through the machine until the water no longer smells strongly of the descaler. Kettles often need several full boils and dumps, especially after vinegar. Coffee makers may require back-to-back rinse cycles because solution can remain in the boiler and internal tubing.
Do not rely on “no visible foam” as a sign that rinsing is complete. Residual acid can affect taste and may irritate some people’s stomachs, particularly if they are sensitive to sour flavours. If you have a water filter, remove it during descaling unless the manual says otherwise, since filters can trap descaler and complicate rinsing.
Set A Maintenance Schedule
Frequency depends on water hardness and usage. A practical starting point is to descale when you see visible scale on the kettle base or when coffee taste changes. Many households with hard water descale kettles every 1–3 months, while coffee makers may need monthly or every few months depending on model and usage volume.
Some coffee machine manuals specify a descaling interval based on number of drinks or litres processed. If your machine has a reminder light, treat it as a trigger for descaling rather than ignoring it until the next service. A mild frustration many owners report: the reminder appears, and they delay, then the internal flow slows enough that the machine starts behaving “weird” during brewing.
Educational Case Examples
Scenario A: Hard Water Kettle With White Crust
A household notices chalky deposits around the heating plate and a longer time to reach boiling. They use a citric-acid descaler labeled for kettles, fill to the marked level, heat briefly, then let it sit for the label’s contact time. After emptying, they run two full boils with fresh water and discard both. The next day, the kettle heats faster and the water tastes neutral, suggesting rinsing was sufficient.
Scenario B: Coffee Maker With Off-Taste After Cleaning
An owner descaled with vinegar but stopped after one rinse cycle because the machine’s exterior looked clean. The next morning, coffee tastes slightly sour and the water reservoir smells faintly acidic. They run additional clean-water cycles until the odour fades and the taste returns to baseline. The lesson is that coffee makers retain descaling solution in internal lines, so rinsing needs to match the machine’s internal volume and flow path.
Checklist For Safe Descaling
| Step | Kettle | Coffee Maker | What To Watch |
|---|---|---|---|
| 1. Read the manual | Confirm descaling method and materials | Confirm approved descaling cycle | Some seals and metals vary by model |
| 2. Mix/dose | Use label or manual ratios | Use the machine’s specified amount | Avoid over-dosing to reduce residue |
| 3. Run contact | Heat and soak for stated time | Run through the internal water path | Do not exceed soak time for internal parts |
| 4. Rinse cycles | Boil and discard 2–3 times | Run multiple clean-water cycles | Stop when odour and taste normalize |
| 5. Inspect | Check base for remaining crust | Check flow and brewing consistency | Repeat descaling if scale persists |
Common Mistakes That Backfire
Using metal tools to scrape deposits can scratch surfaces and create rough spots where scale bonds more strongly. Plastic or soft non-scratch tools are safer for kettles, and internal coffee maker parts should never be scraped.
Mixing cleaners is another frequent error. Combining descalers with bleach or other household chemicals can create harmful fumes and can damage seals. Stick to one descaling product at a time, then rinse before any further cleaning.
Skipping the rinse step is the mistake that most often leads to taste problems. Even when the machine runs normally, residual acid can change flavour for several brews, and some people notice a lingering sourness.
Choosing the wrong product for the material can also cause trouble. Some appliances include aluminium or rubber components that can react poorly to strong acids or prolonged exposure. If the manual lists a specific descaler type, follow it; if it does not, use a product designed for small kitchen appliances and follow the stated contact time.
FAQ
How Often Should I Descale?
Descale when you see visible scale on the kettle base, when heating slows, or when coffee taste shifts. Many households with hard water do kettles every 1–3 months and coffee makers every 1–3 months, but model manuals and water hardness indicators should guide the exact interval.
Can I Use Vinegar Instead Of Descaler?
Vinegar can dissolve calcium carbonate, but appliance manuals vary on whether they allow it and how to dilute it. If you use vinegar, follow the manual or a label that matches your appliance type, then rinse with multiple clean-water cycles to remove odour and residue.
Why Does My Coffee Taste Sour After Cleaning?
Sour taste usually comes from residual descaling solution in the boiler or internal tubes. Run additional clean-water rinse cycles until the smell and taste return to baseline, and avoid stopping after only one rinse.
What If Scale Won’t Come Off?
Persistent deposits often mean the dose or contact time was too low, or the solution never reached the deposit area. Repeat descaling using the correct ratio and time, and check for trapped scale in crevices around the heating element.
Is Limescale Harmful To Drinkers?
Limescale itself is mainly mineral deposits and is not typically described as a direct health hazard for most people. The practical concerns are taste changes, reduced heating efficiency, and possible machine performance issues that can lead to inconsistent brewing.
Author's Insight
Limescale removal depends on chemistry and on the appliance’s internal water path. Calcium carbonate dissolves in acids, but coffee makers retain solution in boilers and tubing, so rinsing cycles matter as much as the descaling step. Manuals often specify contact time and rinse volume because seals and sensors vary by design.
When evidence is uncertain for a specific model, the safest approach is to follow the manufacturer’s descaling instructions and use a descaler labeled for that appliance type. If you track water hardness and cleaning dates, you can predict when scale will reappear rather than waiting for visible crust.
Key Takeaways
Descaling works by dissolving calcium carbonate, so use an acid-based product and respect the stated dose and contact time.
Rinse until odour and taste normalize, especially for coffee makers where solution can remain in internal lines.
Set a schedule based on water hardness and usage, and repeat descaling if scale persists rather than scraping or mixing chemicals.